 Asset Create
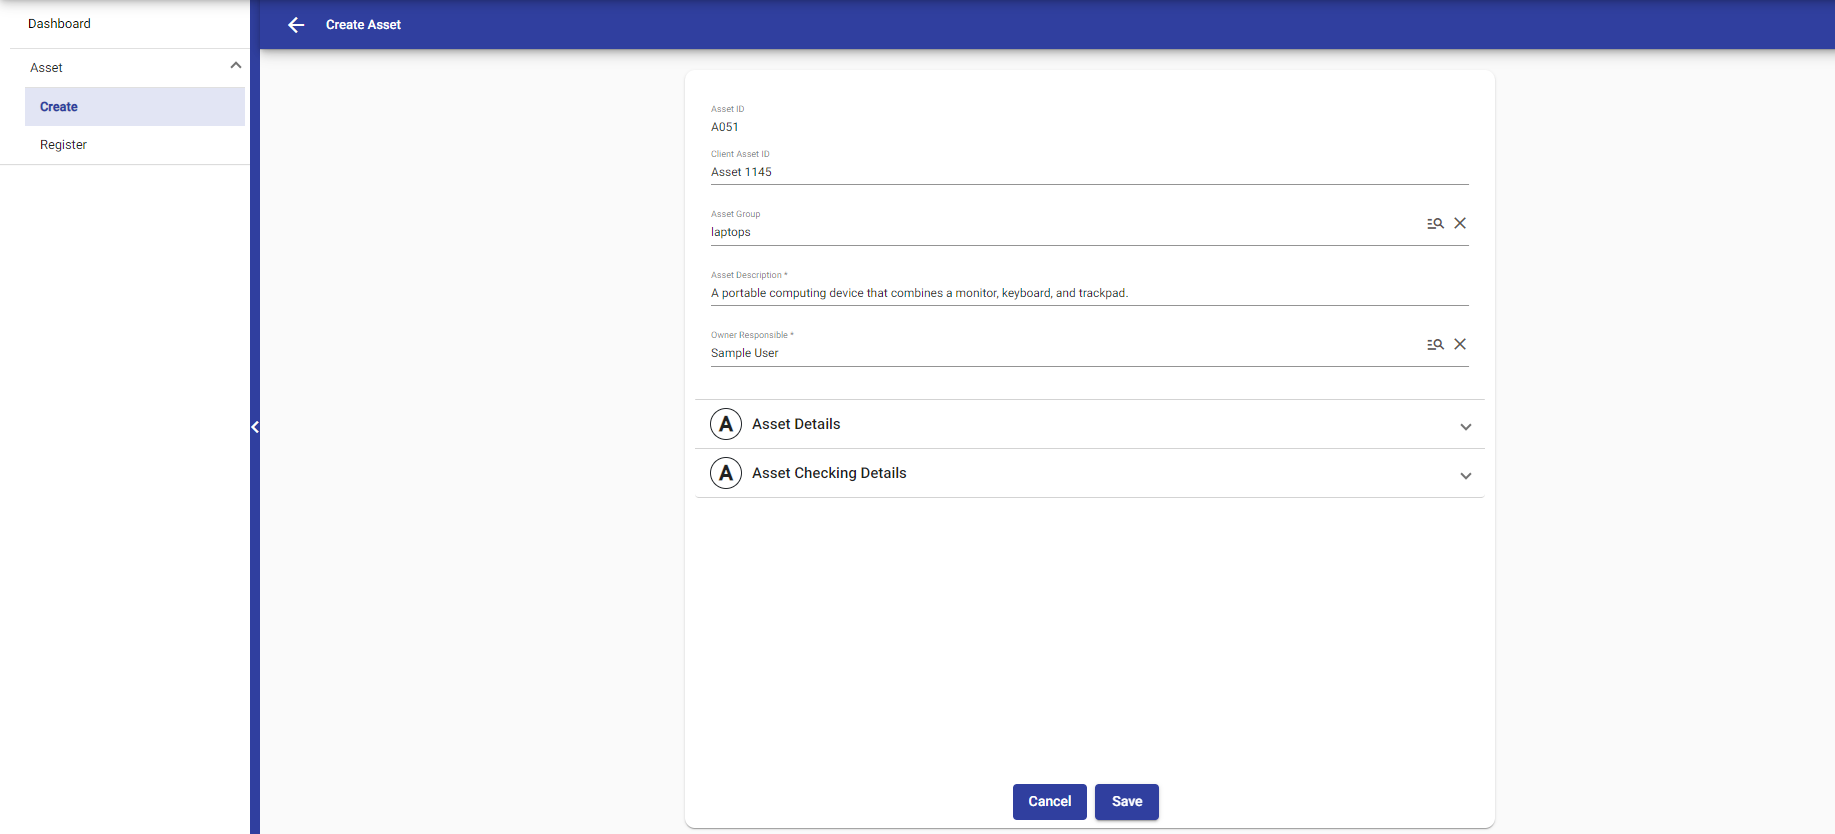
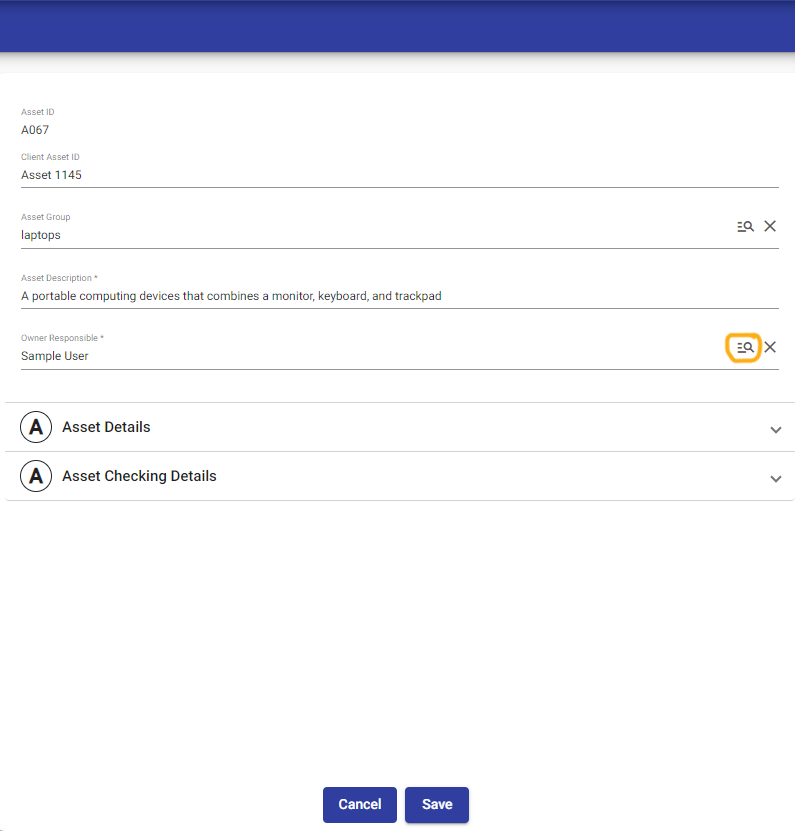
To create an asset, there are typically two essential sections that need to be filled out. Additionally, mandatory information must be provided such as the asset ID, asset group, asset description, and the responsible owner at the top section of the asset creation form.
 In the asset group field, Asset groups can be created by the asset manager and not asset user or general user.
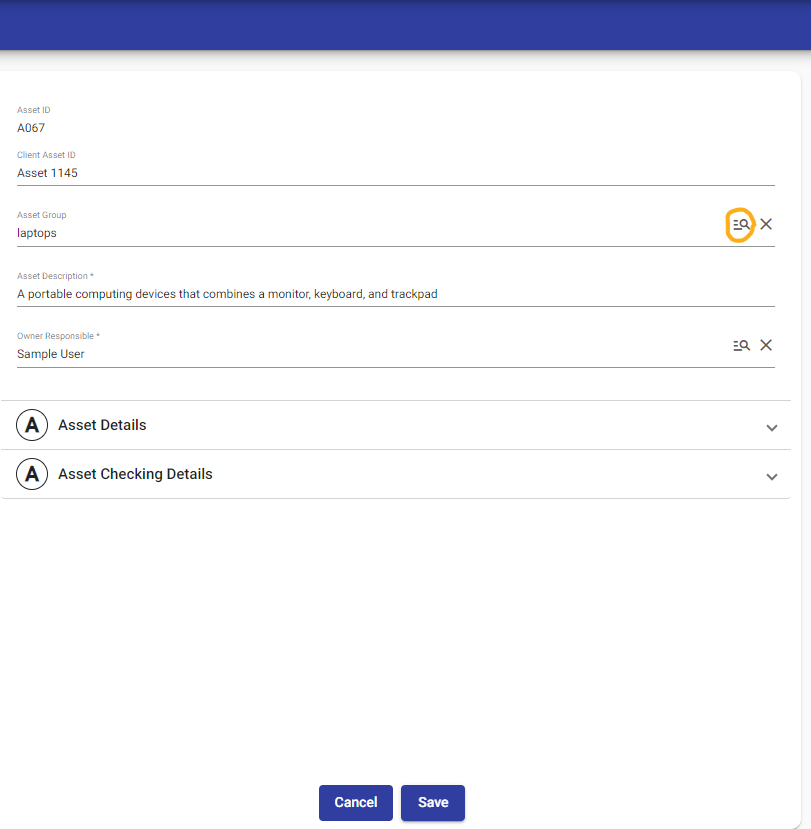
Click the search icon from the right-hand side of the asset group field to choose asset group..
 you have the option to either create a new group by clicking the plus icon or select an existing group.
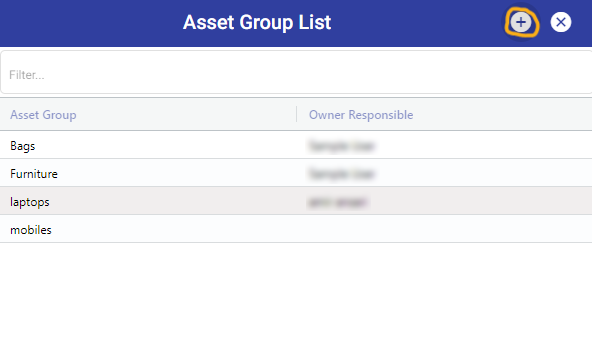 After selecting the plus icon, user can create the group and also select the owner responsible by clicking on search icon
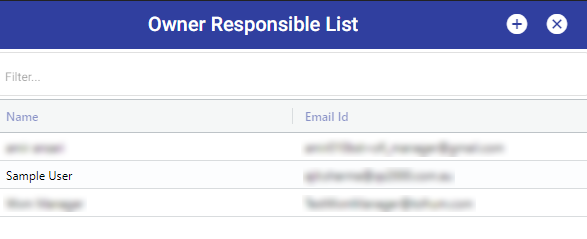
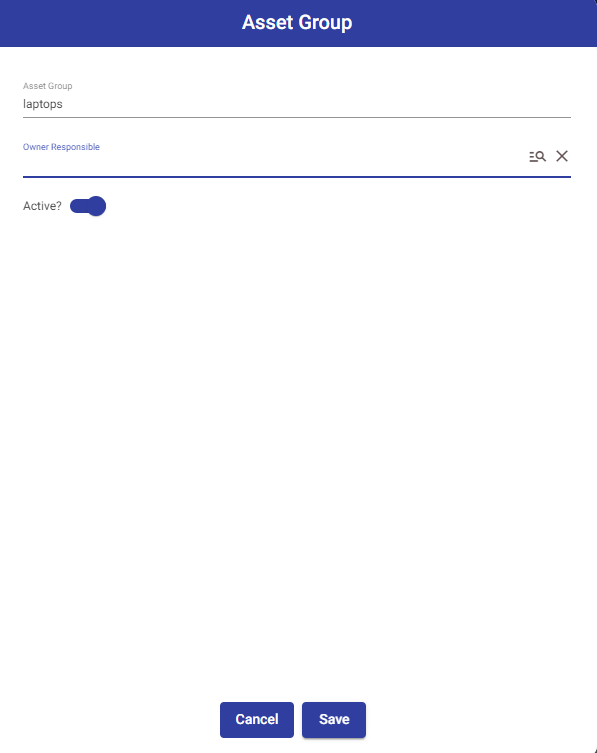 When created the group, the owner responsible is usually assigned by default. However, you have the flexibility to change the owner responsible as needed by clicking on search icon in owner responsible field.
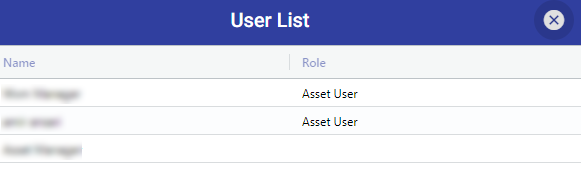
 To modify user access, you can click on the plus icon. However, please note that only managers have the authority to change user access.
 In the Asset Details section, you need to provide detailed information about the asset. This includes the model number, serial number, business value, information classification, user location, and whether the asset is active or inactive.
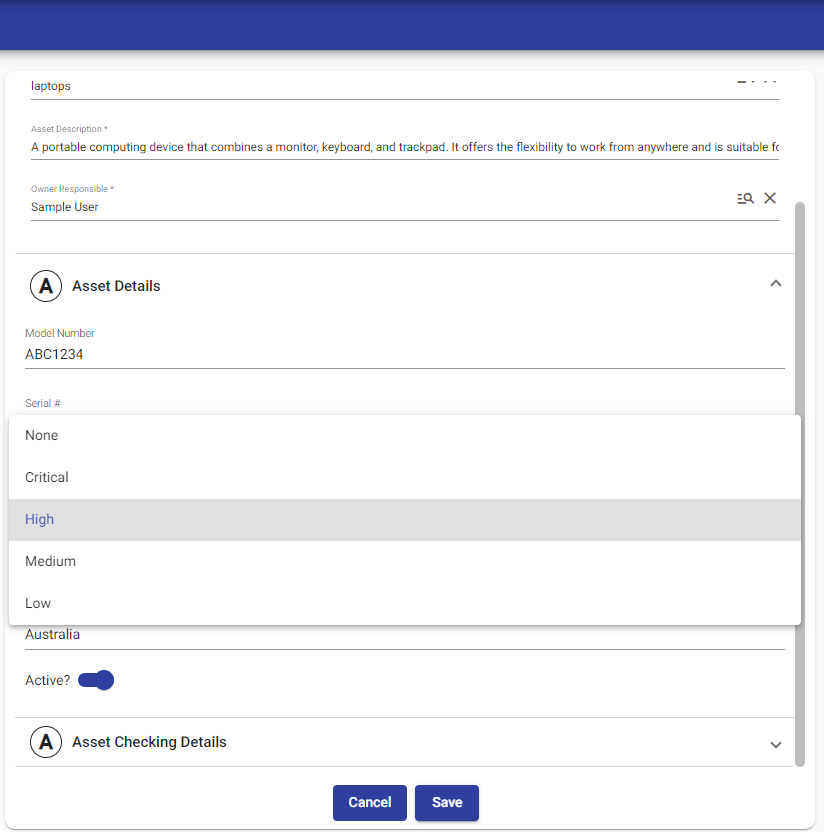
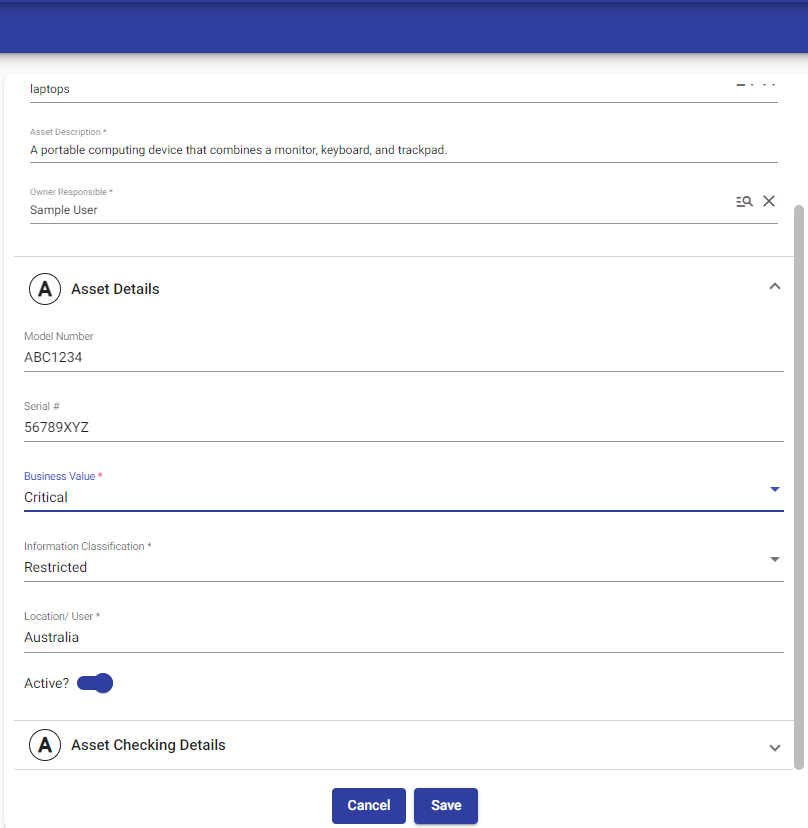 In the business value field indicates the importance or significance of the asset, such as whether it is critical, high, medium or low in value.
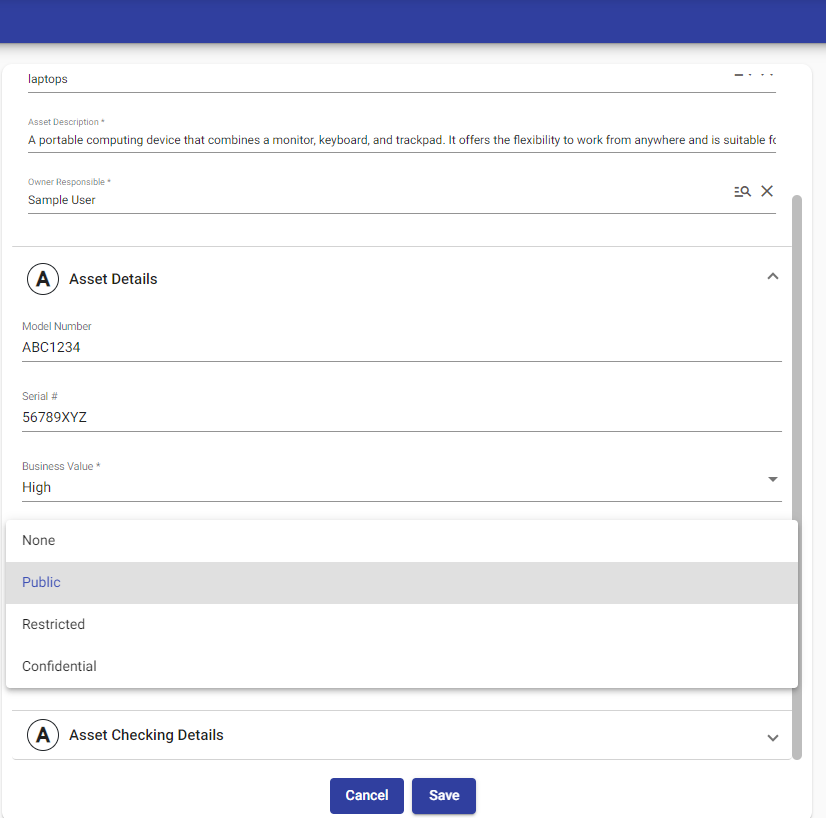
 The information classification field specifies the level of confidentiality or access restrictions associated with the asset, whether it is public, restricted, or confidential.
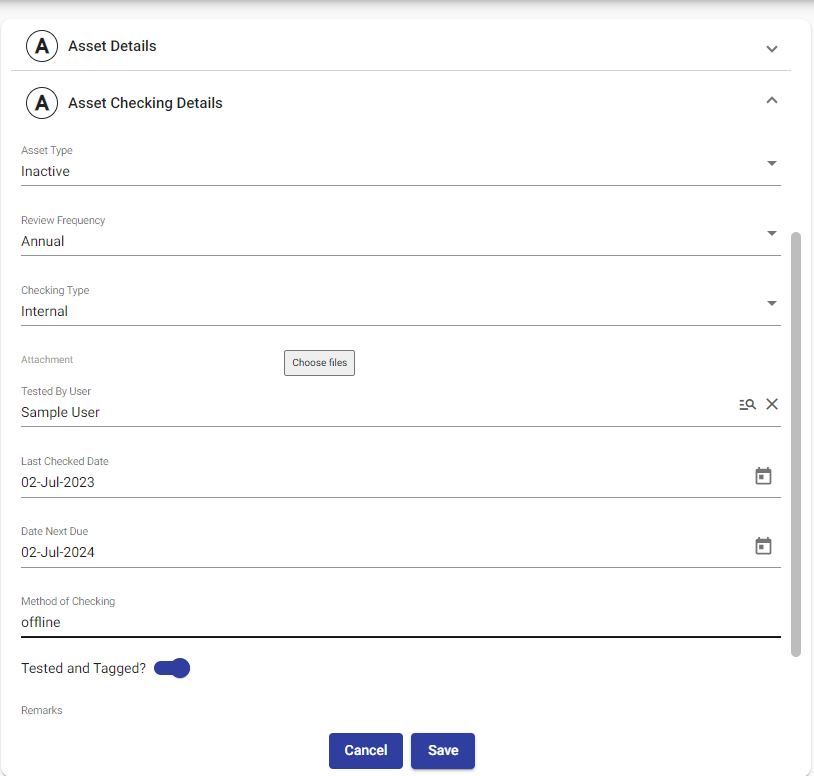
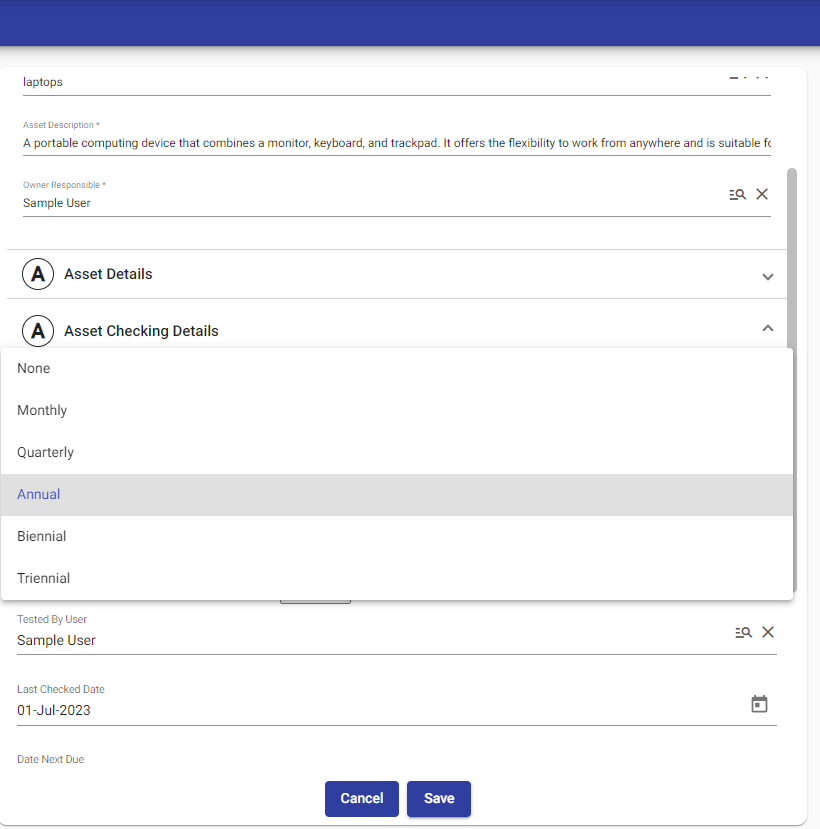
In the Asset Checking Details section, you provide the checking details for the asset.
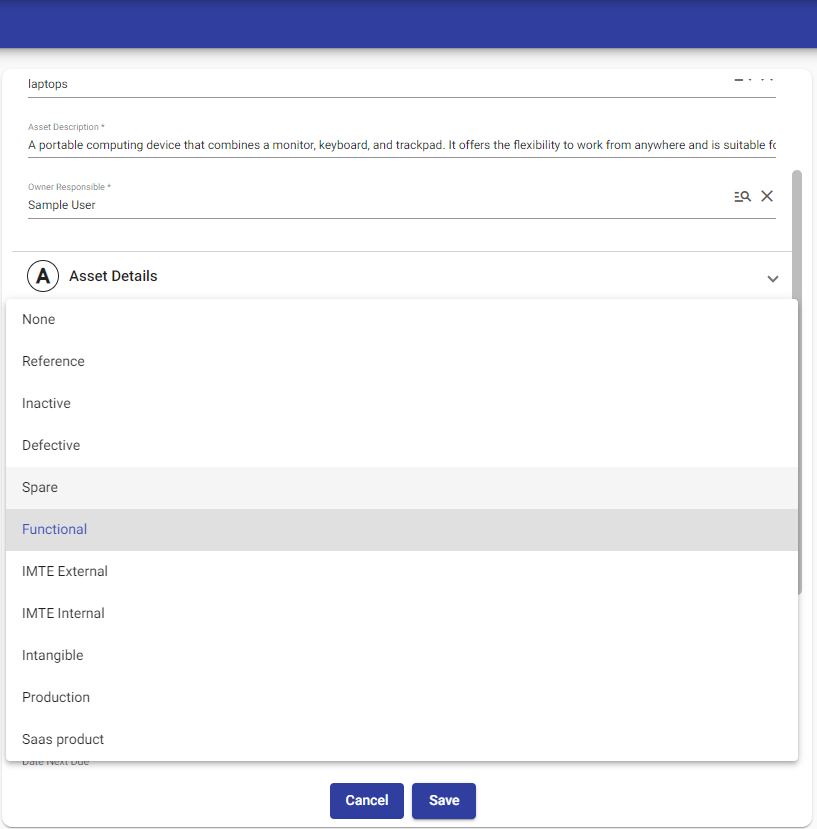
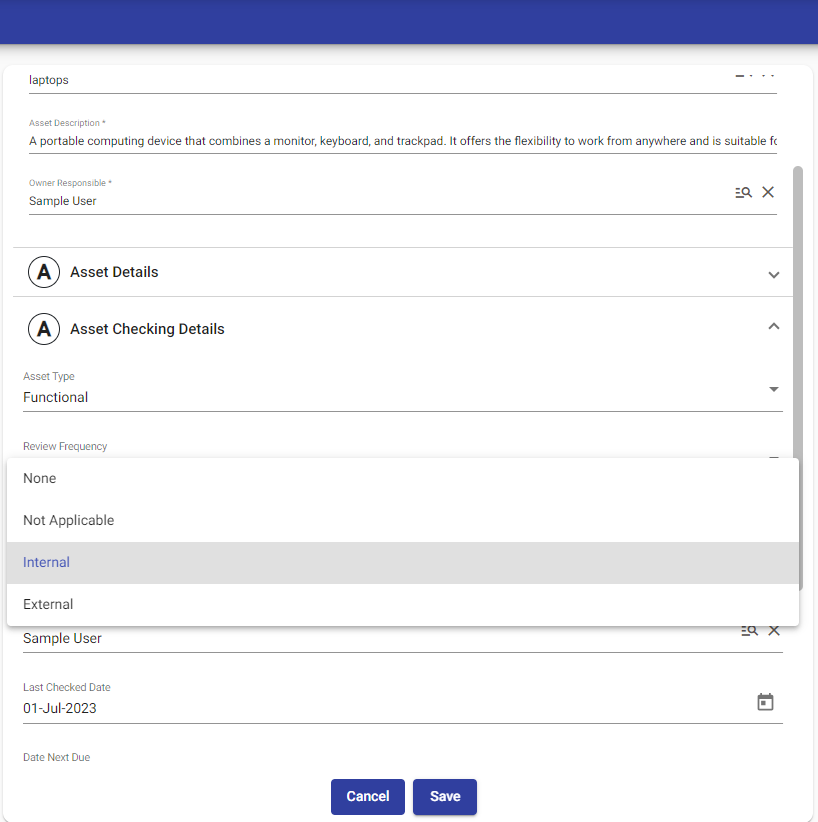
 This involves specifying the type of asset, such as whether it is defective, inactive, a reference etc.
 Then, you need to indicate the review frequency, which determines how often the asset should be checked, whether it's Monthly, Quarterly, Annually, Biennial and Triennial.
 Next, you need to select the checking type, whether it's None, Not Applicable Internal and External.
 After that, When filling in the Next Due Date, it is typically auto-populated based on the Last Checked Date and the Review Frequency of the asset. This feature helps ensure that the asset is scheduled for review or maintenance based on the defined frequency, making it easier to track and manage the asset's inspection or evaluation dates.
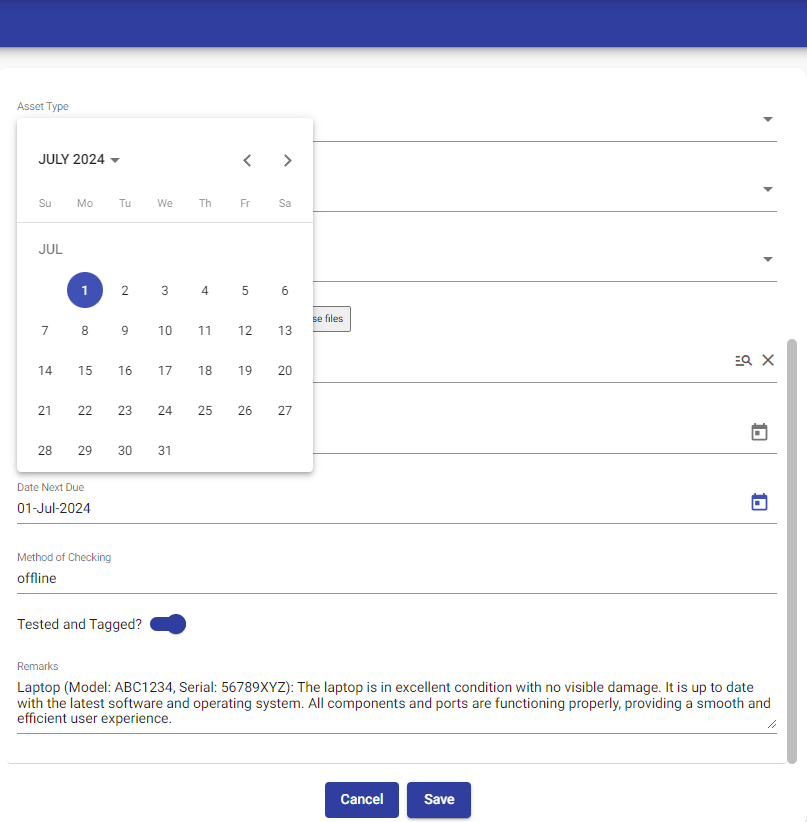 After that, you need to specify the method of checking, whether it is done offline or online and also activate or inactivate. Tested or Tagged means the asset has been tested or not. Additionally, you can provide remarks or comments regarding the checking process. In this section, you also have the option to upload files related to the asset, such as photos or any relevant documents that may be useful during the checking process.
Once you have filled out the required information at the top section, the "Save" button becomes active, indicating that you can proceed with creating the asset. You can then click on the "Save" button to save the entered details and successfully create the asset.
After that, you need to specify the method of checking, whether it is done offline or online and also activate or inactivate. Tested or Tagged means the asset has been tested or not. Additionally, you can provide remarks or comments regarding the checking process. In this section, you also have the option to upload files related to the asset, such as photos or any relevant documents that may be useful during the checking process.
Once you have filled out the required information at the top section, the "Save" button becomes active, indicating that you can proceed with creating the asset. You can then click on the "Save" button to save the entered details and successfully create the asset.
© Tofrum, 2024 • Updated: 16-3-2024
Comment or report problem with topic
